 "Start with a Perfect Board" Make a perfect project with perfect boards.
It is impossible to build a beautiful piece of furniture with a bad board. Curved and twisted boards are a common problem in woodworking. If you don't overcome the problem from the beginning it will plague your project through its very frustrating or more likely unsuccessful end.
Almost all boards from the lumberyard or home center have at least some measure of warp or other distortion. After they acclimate to the humidity level in the workshop, they tend to warp even more. To take care of this problem, some easy preliminary work must be done—called milling. It's done with a jointer, planer and table saw. When you're done the six surfaces of the board should be flat, straight and perfectly square. There are only five steps required to accomplish this.
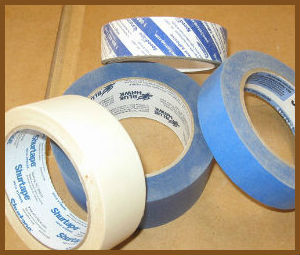 “Under-Appreciated Tool” Tapes all kinds.
I use several different types of tape in the shop, and I turn to them in countless situations. Double-stick tape is probably my favorite solution as a second set of hands or clamping when clamps won't work. Mostly, I use it to hold down a template for trim routing. If the tape is really good quality, it will be very thin and can even be used to hold on edge-banding. I also use mass quantities of blue painter's tape. At any one time, I have about a half dozen different sized rolls. It works great to provide clamping pressure for hard-to-clamp parts like small pieces of trim. When pulled tight, it has a relatively high tension. Blue tape provides a protective layer between the work piece and clamps during a glue-up. The adhesive sticks quickly, but it won't leave the work piece sticky when you remove it. And glue will pull away from it easily. When I'm cutting a panel piece I'll run a large piece of blue tape over the cut line to help prevent chip out. It's great for marking pieces, because it is so easy to remove and there's no sanding required. I also use it for marking locations on power tools. There's probably not a single project I've built without the help of one of this versatile tools.
 “Basics of Routing” Tips to improve your routing skills.
I own five routers! Do I need five routers? Of course – I'm sure I could find a use for a sixth one. I'm in competition with my brother. He had four so I had to buy a fifth one. I'm afraid to tell you that is actually partly true. I did buy the fourth one when he bragged about getting a trim router, but the fifth one was purchased when I realized I needed one with greater horsepower to cut mortises in white oak. The router is by far the most versatile tool in my shop. It does it all, but when I first got started I had to learn many things the hard way and thus the dangerous way. As great as a router is, it isn't the most intuitive tool. There are no gauges, scales or fences on most routers, so hopefully a little advice about setting up and using a hand-held router will be useful.
 “Triangle Marking” Efficient Way to Keep Track of Parts.
If you’ve ever had everything laid out perfectly only to lose track of that perfect alignment when you started working on the pieces, or even worse, you cut all the pieces perfectly until you set them back up and one piece is cut backward, then you understand the need for a reliable and easy marking system. As you improve your skills and start building more complicated projects the opportunities to mix-up pieces increase. Without a system to identify and orient all the parts to a project mistakes are bound to happen. To avoid these potential problems, I use a cabinet-makers’ triangle. There are many options for marking, and I’ve tried many of them. For me the simple triangle gives all the information I need to place and orient every part. Regardless of how complicated the project, the triangle is the simplest way to keep track of all the parts. Here’s how it works. Gang up the parts oriented properly and face up, then draw a triangle over the top of all of them with the base at the bottom and the point at the top. Fine Woodworking has an excellent article on this by Michael Pekovich in the Sep/Oct 2013 edition. If you are an online member you can get the article from Finewoodworking.com Good marking also helps with consistent joinery. When cutting joinery referencing from the marked face ensures a more consistent fit. Finally, when all the pieces are marked well, it makes glue-up less complicated and faster.