5 Apr 2015 Marquetry Patterns
Marquetry Patterns cont.
With your woods selected, spend some time drawing up some pictures of what you want the inlay design to look like. I ended up working in a herringbone pattern that I had seen from another project. I have to admit most of my best ideas are stolen, but if you are the creative type you can likely come up with your own pattern.
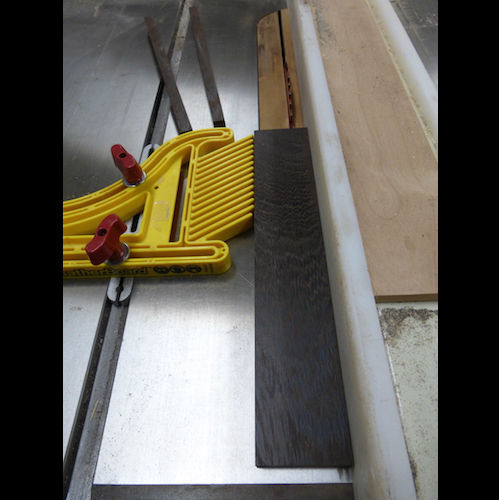
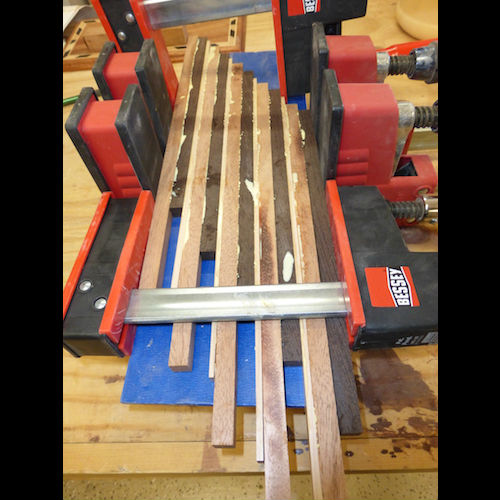
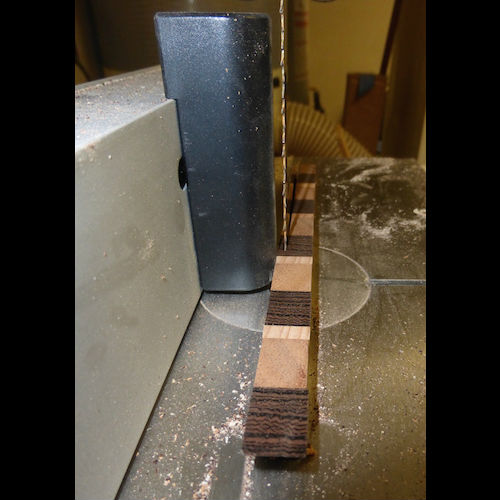
Once you've decided what you would like it to look like, it's time to get to work cutting strips. Depending on your pattern, you may want to cut them different sizes. In my project, I cut the wenge and the mahogany 1/2" square, and I cut the maple 3/16" wide and 1/2" thick. See photo 1 below. I used a feather board to hold it tight to the ripstop. I sacrificed the end of my push stick to push the piece through the blade. It was a monotonous task of moving the feather board with each cut for each type of wood, but well worth it to have perfectly cut strips. I cut about four or five pieces of each species. I then glued up the pieces. See photo 2 below, notice I glued the strips on an angle to save a little wood. I had plenty and will be able to do another project, but I was concerned that I would go through several strips before I got everything right.
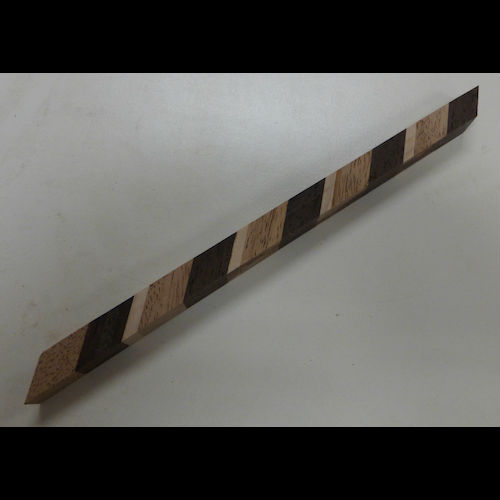
I let the glue set for about twenty minutes. It's pretty dry here in Albuquerque so things dry quickly, and I wanted the glue to still be a bit tacky. I ran my scrapper over the squeeze out after I took off the clamps. See photo 3 below. With the glued-up strips completely dry, I was ready to make some different strips. I set my miter gauge at 45 degrees and then I cut off the rough edge. Once you decide how wide you want your inlay strip to be you can make your next cut. I knew I was going to use a 1/2" straight bit to make the groove to accept the inlay, so I cut the strips about 17/32" Get it close but for sure make it a little larger than the groove you will cut in the board receiving the inlay. See photo 4 below.
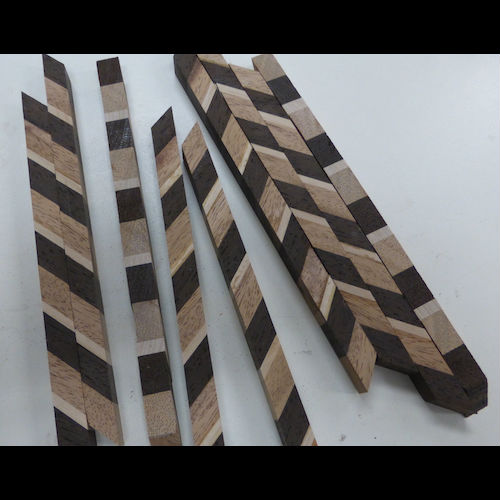
Now you should have a bundle of inlay strips. See photo 5 below. Now comes the tedious part—get your patience and your push stick ready. Over at your bandsaw set up your guide to cut 3/32" or slightly larger than 1/16". See photo 6 below. Cut off several thin inlay strips. Take your time and make the cuts nice and even. In hind sight, I would probably go ahead and make the inlay about 1/8" think just to make them a little stronger and make the cut a little easier.
It's time to cut out your pattern. If you have a small miter box then you could use it, but I just set up my 45 degree angle on my sanding cleat and used my dovetail saw. It worked fine. See photo 7 below. There are probably plenty of specialty tools for marquetry that would make this more precise and easier, but I don't see myself doing this enough to invest in additional tools when this worked out just fine. For the straight cuts, I just removed the angle guide. See photo 8 for the pattern lay out. I used the pattern I designed to determine the size of the box lid. I have to be honest; I used an unconventional method because the whole purpose for me was to practice this inlay technique. Most likely you will be building a project to a specific size and you'll then cut the inlay to fit it. Keep that in mind so you can work with the pattern to create a nice beginning and ending.
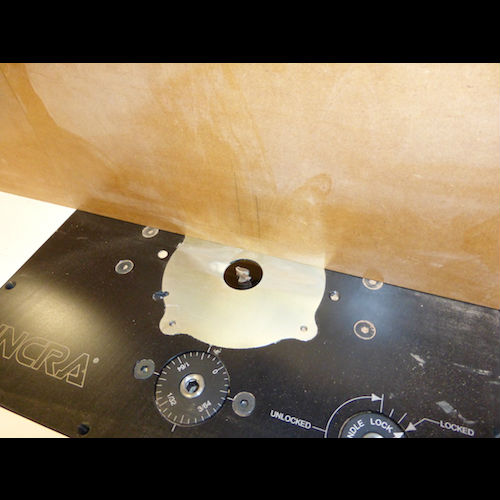
With the lid cut to size, I cut the groove in the top to accept the inlay I just worked so hard to create. Insert the straight bit you plan to use in your router table. See photo 9 below. As I said earlier, I used a 1/2" straight bit. Then set your fence 1/2" away from the inside edge of the router blade. Use a straight edge and mark on your fence with a pencil the exact end and beginning of the blades cut. If you look closely on photo 9 you can see my pencil marks. This will let you know where to start and stop the cut. Then on the back of the board (box lid) mark 1/2" from all sides. See photo 10 below. Look closely and you can see the tiny pencil marks on the board. Set the blade to 1/16" for the depth of the groove. (Here again, I would have cut the groove a little deeper to accept the thicker strips.) Now start the router and with the board at an angle above the blade use your marks and set the board down on the spinning blade and run it through the router until the ending mark on the board is very close to the ending mark of the blade that you marked on your fence. Be very careful to stop before you get to the mark. See photo 11 below. Now that you have the groove cut in the lid use a chisel to cut the corners square. See photo 12 below. Take your time here and get if perfectly square and even with your router cut. If these corners are messed up it will be very obvious.
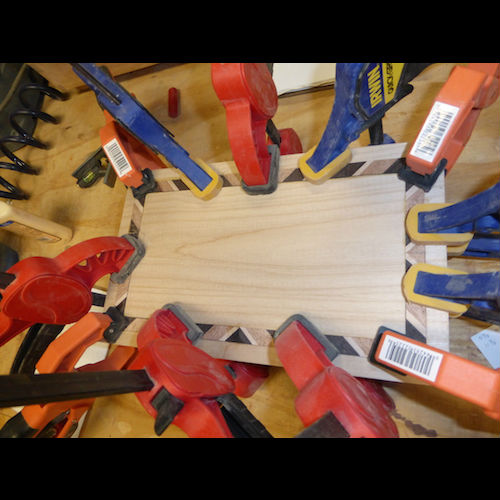
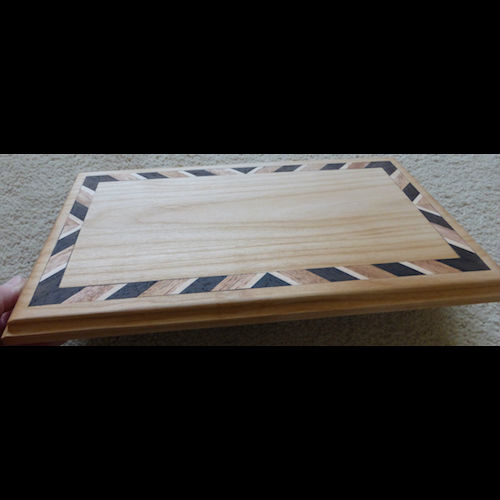
Finally put the strips in the groove and glue it and clamp it down. See photo 13 below. Use lots of clamps to get it secured all around. When you take it out of the clamps it’s time for sanding, scrapping or planning. If you have a very very sharp planner you can plane down some of the material before you scrap and sand. I sanded everything down to 220 grit. As a final touch, I used an ogee bit and put a little curve on the edge. Then you are ready for finish. Depending on what you plan to do with the project you can use some oil and wax or a few thin layers of polyurethane. See photo 14 — all done!